Pages

Showing posts with label Southern Ways. Show all posts

Tuesday, December 20, 2011

I’m a Cheater who Doesn’t Update Enough (Chicken and Dumplings Made Easy)

I keep promising myself I will blog more, and somehow I always wind up failing to do so. I have been a very busy woman in the kitchen. I’ve probably baked ten dozen cookies, and I’ve baked several pies; obviously I’ve cooked a variety of meals, though mostly it’s been simple stuff like hamburgers or fried chicken. I even made the crust for some of my pies. However, I haven’t done much worth blogging about. I’m going to make it my goal to cook more and blog more, so if you are reading this, welcome to the show.

ON TO THE FOOD

(without pictures because my batteries were dead)

Simmering in a large stock pot in my kitchen are what I like to call Chicken and Dumplings Made Easy. The trick is not making the dumpling from scratch, even though if you can make biscuits you can make dumplings easy enough. However I do have a new tag called Easy Peasy which will have meal ideas that are simple to do and require minimal ingredients, like the meal at hand.

Basically you boil chicken breasts, on the bone and with skin, with a little butter, salt, pepper, and any other seasoning you like, and then you drain them, saving some of the broth. Remove the bones and skin and put the meat back in the pot, covering them with chicken stock, some of the broth from boiling the chicken, and extra water.

To make the dumplings, all you do is take store bought homestyle biscuits, the kind that come in a can from the refrigerated section of the grocery store, and roll them out thin. With sharp knife, slice them into strips and drop them into the pot. Sometimes I add a bit of flour to the pot to thicken it, but otherwise just simmer until the dumplings are tender and not doughy. Simple as can be!

Recipe (not really) for Chicken and Dumplings Made Easy

4 Large Chicken Breasts still on the bone with skin
2 T Butter
Salt & Pepper to Taste
4 Cans of Homestyle Biscuits
32 oz. Chicken Stock (more if you’d like a stronger flavor)
Water

  • Boil the chicken with butter and seasonings until tender and falling off the bone
  • Drain chicken, remove bones and skin
  • Pour stock and water over chicken
  • Roll biscuits until they reach desired thickness, slice into strips, and drop into pot
  • Simmer until dumplings are tender and not doughy

Saturday, October 22, 2011

Southern Style Biscuits

This morning I made biscuits for breakfast, channeling my nanny, and they turned out pretty fabulous. Using a recipe pretty much adapted from the back of a bag of self-rising flour, I managed to make a batch of soft light biscuits. The thing about making biscuits the way my nanny made them is that you basically take the recipe and double it, adding a bit of shortening and milk to make sure the amount of moisture in the mixture is right. I apologize for the lousy picture quality; food photography is another talent I am working on cultivating, and I haven’t gotten close to mastering it yet. But I will keep practicing and eventually I’ll get better.
You start by blending together the shortening and flour until crumbly; you can use a either two knives or a pastry blender, but I prefer my pastry blender because its much easier. I can blend things one handed, while holding the bowl steady, and I simply use a fork to occasionally scrape the shortening off the blender into to the bowl.
biscuit1
The next step is mixing in the milk with a fork; I normally discover that I need more milk to make sure that the entire mixture is moist. Don’t over mix the milk and dry ingredients; all you have to do is mix it until the dough forms and begins pulling away from the sides of the bowl. Once that’s done, sift a little flour onto your hands and dump the dough onto a floured surface. I cover my counter with wax paper because I don’t want my biscuit cutter to scratch the counter. If you don’t flour your hands and the surface, you are going to wind up with a sticky mess.
biscuit2Then you knead the dough until smooth; I recommend sifting all-purpose flour over the dough and over your hands frequently to avoid having it stick to everything it touches.  Work from the outside in, pulling the dough toward the center; don’t over or under work the dough or your biscuits will be tough and hard. Once the dough is smooth, sift flour over your roller and roll the dough to a quarter inch thickness; the thicker the dough, the higher your biscuits will rise. You can also fold the dough over before cutting it to make larger fluffier biscuits. Dip your biscuit cutter in flour and press straight down to cut.
biscuit3Lift the biscuits from the trimmings and place them on a pan; if there is enough flour on the bottom of the biscuits after cutting, you shouldn’t need to spray your pan with non-stick. Re-knead and re-roll the dough to cut remaining biscuits. Before baking, I recommend dusting the excess flour from the tops. Bake at 450 degrees for about ten minutes, and if your biscuits are not brown enough you can pop them into the broiler for a few minutes.
biscuit4
Southern Style Biscuits
4 cups self-rising flour
1/2 cup shortening
1 1/2 cup milk

  • Preheat oven to 450 degrees
  • Blend shortening and flour together until crumbly
  • Stir in milk with fork until dough forms and pulls away from the sides of the bowl
  • Knead dough on a floured surface until mostly smooth; roll to about 1/4 inch thickness
  • Cut biscuits out with floured biscuit cutter, re-kneading and re-rolling trimmings if needed.
  • Bake on cookie sheet at 450 for about ten minutes; more time may be needed for thicker biscuits.
On a totally unrelated note: I would like to leave my swagbucks referral link here; you earn points that can be traded in for gift cards and items just by doing what you normally do online.

Friday, October 14, 2011

Passing it On

In Southern families, recipes and cooking tips are often passed down from mother to daughter; there is something very powerful and important about the way that works. It’s way of passing not only family traditions, but also preserving the memory of someone you love. I’m writing this entry because I am losing the person who inspired me to get into baking and cooking in general. My mom can cook, but she doesn’t have the same ridiculous obsession I seem to have with food and cooking and baking; I think it skipped a generation, and my Nanny (maternal grandmother for those of you who don’t know) passed her love of cooking to me.

When I was younger and my Pa (my Nanny’s third husband and the man I counted as my true maternal grandfather) was alive, Christmas Brunch was done at their big house on the farm, and it was huge. My Nanny would cook so much that you would think she was feeding an army. Massive piles of homemade biscuits and bowls of homemade gravy, plates full of sausage, ham, and bacon, plenty of scrambled eggs, a huge turkey, real mashed potatoes, corn, pinto beans, rolls, macaroni and cheese, and so much more. There were probably twenty of us back then, maybe a few more, and the spread was always more than we could eat; on top of that she made desserts, pecan pie, chess pie, chocolate cake, plus a variety of candies she’d made. Thanksgivings and Easters were similar, though breakfast food was not prepared. Her habit of cooking large meals was not deterred when the number of people was smaller or when it was just a Sunday dinner; my Nanny always cooked for an army. I honestly think her enthusiasm inspired my own interest in culinary attempts, and I will always be grateful for that. There is a picture of me, when I was no more than a year old or so I think, sitting on the counter, covered in flour, while my Nanny made biscuits; I know for a fact that I was the only grandchild who was ever permitted to do such a thing, and I remember her excitement when I first expressed interest in learning to cook.

Mama is often full of advice when I need it, but often, when it comes to cooking, Nanny is the person I need. I always ask my mom things like “How did Nanny do this?” or “Do you remember if Nanny had a recipe for this?”, and her typical response was to tell me to call her; now I won’t be able to do that. My Nanny is very ill, and she is not going to get better; she was such a big part of my life, and now she is going to be gone. It’s breaking my heart, and I am barely handling it. I was so proud of myself for making her “No Fail Chocolate Pie” on the first attempt, and when my biscuits turned out perfectly for the first time, but I only got to share the pie moment with her because by the time I attempted biscuits from scratch (for some reason I never got around to it until just recently) she was already far too ill; it killed me that while I could tell her all about it, she couldn’t laugh and joke about how easy it was and suggest something new for me to try. Soon I will only have her recipes and the memory of her voice, and I’m not sure how to handle it. I love my Nanny, and I will miss her so much; I already miss her. That is why I’ve made up my mind that the bakery and sweets shop I plan to eventually have will be called “A Taste of Joy” in honor of Barbara Joy Smith, my Nanny, the woman who opened my eyes and introduced me to the joy of cooking. This blog has officially been retitled permanently as “A Taste of Joy”, and hopefully I will get the money to purchase a decent domain name as well.

Thursday, October 28, 2010

Let’s Spice Things Up: Grilled Chicken Stuffed With Jalapeños

Before I begin, I’d like to point out that I am sorry for the lousy photos from last post, the lighting in my kitchen is terrible due to faulty wiring shorting out a light. This will be remedied in the remodel, and I am looking forward to it. Also, after speaking to a friend about my potato issue last night, she reminded me that sometimes the potatoes can be too starchy, leading to them not taking flavor. I rinse my potatoes to prevent this, but I didn’t do a very good job of it because I was in a hurry. She suggested that I rub the cut ends together and rinse off what builds up to reduce the starchiness. Helpful tidbit really! I plan to try that next time.

Brief remodel update: The new sink arrived this morning, and it is beautiful. However, it was wrong. We ordered a 31” black, cast iron, single basin sink with four holes for the faucet; we got a 31” black, cast iron, single basin sink with three holes. This is problematic, especially since we paid $500 for it. So my father called Home Depot and reordered the sink, the correct one this time, and we are taking the incorrect sink back to the store this afternoon.

Tonight for supper I am cooking grilled chicken stuffed with cheddar, jalapeño peppers, and onions, corn (out of a bag), pinto beans, and cornbread. None of this requires a real recipe, but it does require a taste for spicy food.

My mother loves pinto beans and cornbread, and she does the the inevitable thing that I find disgusting, which is to mash her beans in her cornbread and use extra bean juice. But I digress. When I do pinto beans, I begin the night before by soaking them; I pour the beans into the pot I will use to parboil them the next morning and remove any beans that look bad. The next morning I drain and rinse the beans, removing any bad ones that I may have missed the night before, and then I fill the pot with water and boil the beans for at least an hour with one or two chicken bouillon cubes. While they are boiling I try to skim off any of the residue that may build up on the top. I then drain them again and rinse them to remove any of what I like to call the “bean scum”. Since I have a gas stove and I normally cook my beans all day, for maximum flavor, I put the beans in a crock pot, cover them with water and cook them on low. For flavor I add half a white onion, two dried cayenne peppers because my family likes things spicy, and a spoonful of bacon grease. If I can find decent salt pork that has a good flavor I add that too. But lately I have yet to find any; the best way to determine whether salt pork is flavorful is to fry a piece and taste it. I suppose I should’ve warned you that I am Southern, and we Southerner do not waste things. When I fry bacon, I reserve some of the grease to be used later. I know it sounds disgusting, but it really is helpful.  The only problem with this cooking method is that the juice does not thicken well; to thicken the juice, I often pour the beans into a pot on the stove and bring them to a rolling boil.

Now, you can’t have pintos without cornbread, and cornbread the way my family does it is very simple. First, you will need an iron skillet, properly seasoned with oil. An iron skillet can be seasoned by heating oil in the skillet so that it absorbs it into the metal; this takes time, and it is not a pleasant experience. But a well seasoned skillet is well worth it. Pour enough oil in the bottom of your skillet to cover it; too much and it will cover your batter, too little and your bread will not be crisp on the bottom. Remember, You can always add more oil and heat it; it will be difficult to take oil out. Now, heat the oil and the skillet to 375 degrees; this can be accomplished in one step by letting the skillet heat as the oven heats. For the bread you will need milk, one egg, and self-rising cornmeal mix. I simply add blend together the ingredients until I get the right consistency, keeping in mind the size of my skillet. The thicker your batter, the dryer your cornbread will be. Once again, bear in mind it is easier to add than it is to subtract; also bear in mind that if you have to blend in more meal or more milk its going to increase the amount of batter fairly significantly. Once blended well, I pour it into the hot oil and bake until done. The bread is done when a toothpick can be inserted into the thickest part of the bread and come out clean. The bottom will be crisp and brown, and you can flip the bread from the skillet onto a plate and cut.

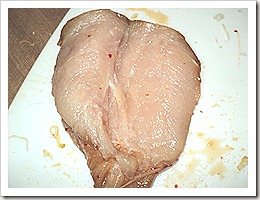
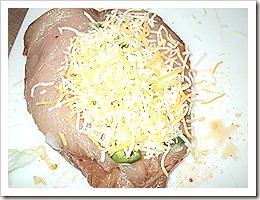
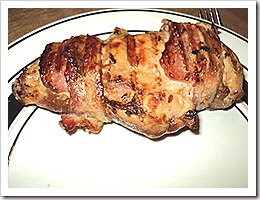
Finally we have the chicken, which was not as difficult as one would imagine. First I chopped up one whole white onion and sliced three medium jalapeños; using my quick chop, I diced them very small and mixed them in a bowl. I then sliced four boneless chicken breasts with a sharp filet knife, opening them up so I could fill them. The chicken was marinated in Allegro Hot & Spicy marinade for three days, which gave it a slightly darker color in places and added to the spice. I put two spoons full of the onions and peppers into each chicken breast and topped it with shredded cheese. I used Kraft Mexican Four Cheese Blend.
 DSC00345       DSC00351
DSC00352        DSC00353

Once each was filled, I rolled them tightly and wrapped them in slices of bacon, which acted as a sort of bandage holding the chicken together. While the chicken was convinced that I was helping it by bandaging it with bacon, I skewered them with bamboo skewers and grilled them.
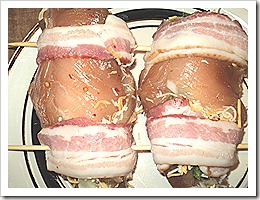
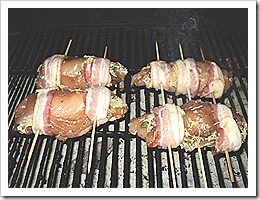
DSC00354              DSC00355DSC00356              DSC00357

Once they were done, I slid them from their skewers and served them. The cheese and vegetables acted as a sort of glue holding the chicken in shape. These, combined with the spicy pinto beans, were enough to require a glass of milk to cool the mouth. They turned out delicious, even if getting a final shot of the filling was difficult and none of them came out well.
DSC00359              DSC00364

Recipe (not really a recipe) for the Pinto Beans: Sassy Southerner Style:
One bag of pinto beans
Two chicken bouillon cubes
1/2 White Onion
Two dried Cayenne Peppers (whole)
One spoonful bacon grease
Garlic powder, onion powder, and other seasonings to taste
  • Soak beans over night
  • Rinse beans and parboil for at least one hour with bouillon
  • Rinse beans and transfer to pot
  • Add onions, peppers, and grease, season to taste and cook until done.
A Simple Recipe for Cornbread:
One egg Self-rising cornmeal mix Milk Vegetable/Canola Oil or Olive Oil or Shortening (enough to cover the bottom of the iron skillet)
  • Heat oil in seasoned iron skillet to 375 degrees
  • Blend ingredients until desired consistency is reached, adding meal and milk as needed
  • Pour batter into skillet
  • Bake until a toothpick inserted into the middle comes out clean
The Renegade Kitchen’s Jalapeño Stuffed Grilled Chicken:
Four medium sized boneless chicken breasts (marinated if you wish) Three medium jalapeño peppers (sliced) 1 White Onion (sliced) Shredded cheddar cheese 6-8 slices of bacon Four to five bamboo skewers
  • Finely dice peppers and onions, then mix together
  • Slice chicken along the side of the breast, laying them open flat. Do not slice completely through.
  • Fill chicken with desired amount of peppers and onions, then top with cheese
  • Fold the chicken over so that the filling is covered, then wrap each breast with two slices of bacon, making sure it is wrapped tight to hold the meat closed.
  • Once the chicken believes it is safe, stab it with skewers Secure the chicken with skewers; you should be able to use two skewers to hold to breasts. Be sure to insert the skewer through the bacon and in such a way as to hold the chicken together.
  • Grill chicken until the meat is firm, the juices run clear, and the meat is white. Turn the meat frequently to prevent burning and ensure even cooking.